
USB Disk Protection Settings
USB Disk Protection Settings window provides optional customizable settings of Stop Auto-run USB Virus, and USB Accessing Scan.
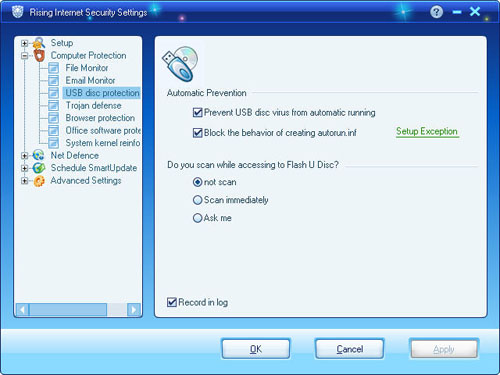
Launch Rising Internet Security 2011 program main interface and, click [Settings] -> [Computer Protection] -> [USB Disk Protection], and then customize each option allocated on right area of USB Disk Protection settings window.
Common Settings:
- Stop Auto-run USB Virus: Enable this option to stop suspicious automatic execution behavior while removable devices connect to local computer via USB port.
- Stop creating autorun.inf File: Enable this option to intercept and stop malicious behavior of creating “autorun.inf” file on removable devices. Or click button of [Exclusion Files] to add trusted applications to create autorun.inf file.
- USB Accessing Scan: Customize scan within three optional modes as [Inquiry], [Auto-Scan], and [No Scan]
Enable/Disable USB Disk Protection
Launch Rising Internet Security 2011 program main interface and, click tag of [Computer Protection], and then click button of [Enable] or [Disable] to customize USB Disk Protection status. Meanwhile, computer users can click button of [Settings] to enter USB Disk Protection settings window for more customizable changes.
How to Enable USB Disk Protection with Windows?
All computer users’ custom settings on USB Disk Protection shall be automatically saved, but recovered to last correct setting while computer restart. So, please make sure E-mail Monitor is [Enable] while shutdown computer to ensure enable USB Disk Protection with Windows.
| prev E-mail Monitor Settings | next Trojan Defense Settings |